Here is part two of the series. REVIEW PART ONE HERE
INSTALL LINUX MINT
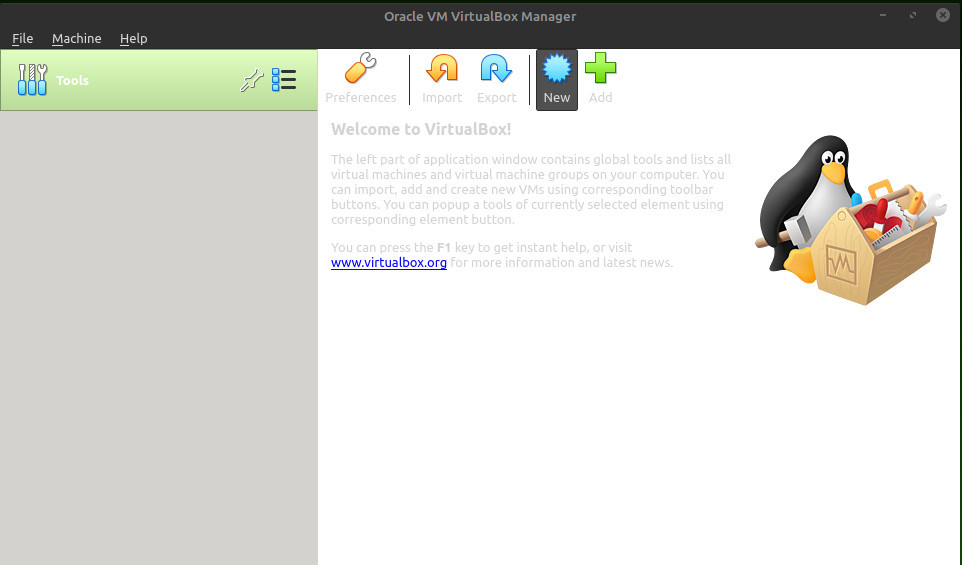
Click on the menu icon in the lower left if using Linux Mint Cinnamon, and type Virtualbox – it should come up as Oracle VM Virtualbox Manager. Once open, click New at the top.


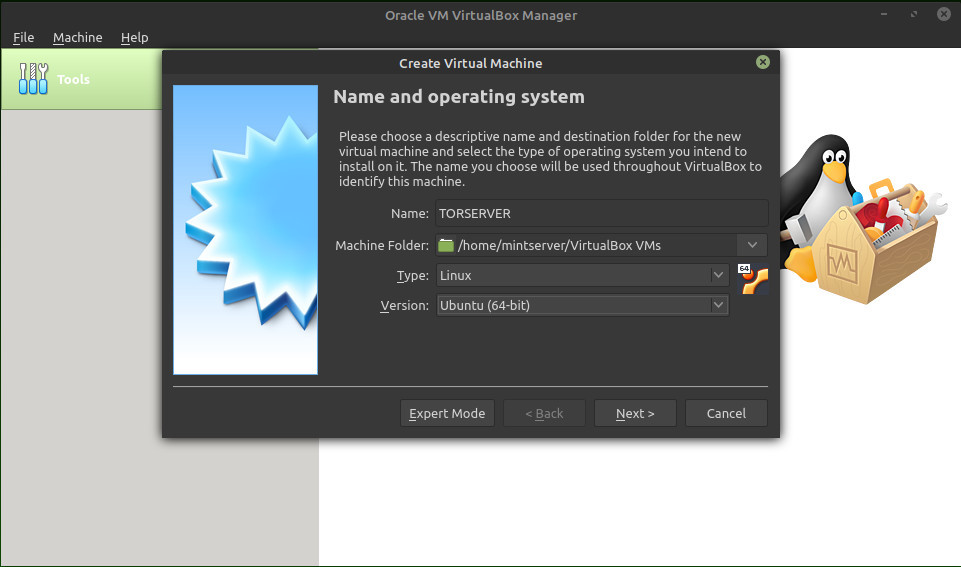
From the screenshot, you can see we selected Ubuntu 64 Bit as the OS (this is what Linux Mint is based upon). You may only get an option to install 32 bit OS’s… if this happens, do a quick search on DuckDuckGo on how to set up your system to run 64 bit Virtual Machines… you will find a solution based on your current OS that the Virtual Machine is operating within. Follow the prompts… I suggest a minimum of 2GB of memory, and preferably 4GB (that is 4096 MB). It will ask you to create a Virtual Machine… select create and use the default selections. Next you will ask how big to make the Virtual Hard Disk. 10GB is selected, but this will not be enough to install the OS… change to 20GB… when you need more it will allocate more space automatically.
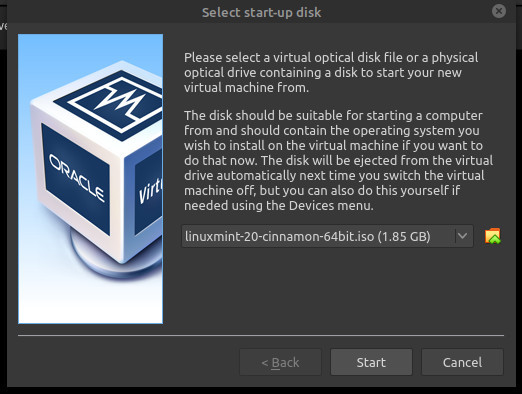
Now it’s time to start the Virtual Machine. Click Start, where you will see a screen asking you to select the start-up disk. Click the folder icon to the right of the Host Drive VBOX CD-ROM, and navigate to the folder where your Linux Mint ISO file is located (probably Downloads).

Select it, and finish by selecting Start. Best suggestion is to watch it count down and start automatically. If all goes well you should see the Linux Mint Logo as your system boots into the ISO. Be patient… it takes a few minutes to load from the virtual DVD.
Double click on Install Linux Mint. If you’re already running Linux Mint as your main operating system, it will be the same as your initial installation. If you’re running Windows, a Mac, or some other flavor of Linux, simply follow the prompts.

Go ahead and select the box to install multimedia codecs… you’ll likely want them in the future, and better to just install them now.
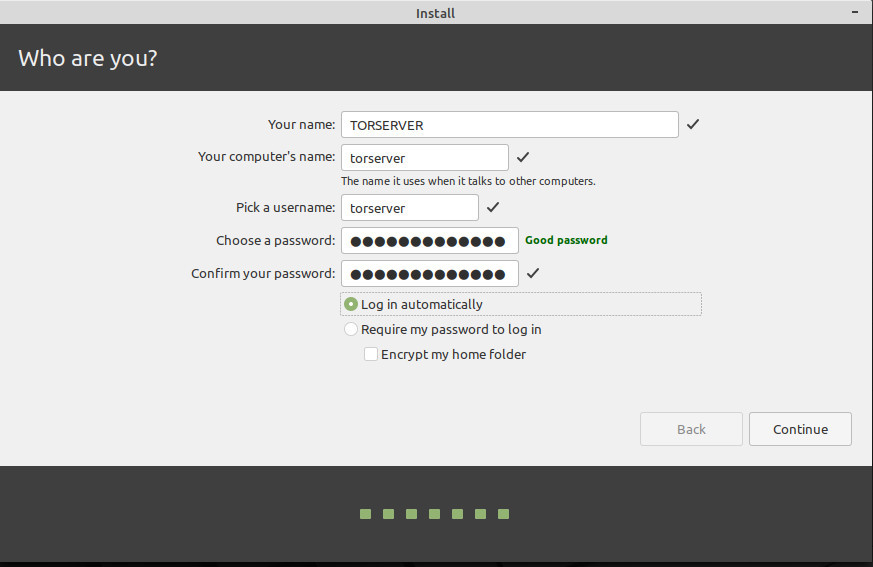
The next screen is kind of scary… it will ask you if you want to erase the disk and install Linux Mint. Don’t worry, it will be installing it on your virtual drive that you created earlier. Select that for simplicity, and click Install Now. Select your time zone, or choose a random time zone, select your name and a strong password, and complete the installation. Once finished, it will ask you if you wish continue testing, or restart. Select restart, and you will be good to go. It will ask you to remove the installation medium, then press enter. Just press enter.
One more thing that you can do that may be helpful, is install the Guest Additions once you have rebooted. This will give you more options for screen size. The way to do this is select Devices in the menu bar at the top of the Virtual Machine window, and click Insert Guest Additions CD Image.
Before you do anything else, enable the firewall. Left click on the menu in the lower left corner, and type firewall. The Firewall Configuration will come up… select it. It will require you to enter your password. Set to enable, and choose DENY for Incoming. ALLOW for outgoing is fine. Close the window.
Next step is to perform all of the updates. Because this is a new install, there will be a lot of them. Be patient, you’re almost ready to set up your TOR Server. To perform the updates, look for the badge in the lower right corner with an orange dot on it. Click that, and it will bring up your update panel. Again, follow the prompts. It may ask you if you want to switch to a local mirror. You can do this if you wish, but “local” will be wherever your VPN server is located (you are running the VPN now, right?)
Another option to update your system is to use the terminal. Ouch! What did he say? It’s easy. The terminal is in the lower left corner with a couple of other panel applets. Mouse over them until the word terminal shows up, and click on that, or you can select CTRL+ALT+T to open it. A gray screen (don’t worry, you can customize that later, just like everything else in Linux Mint) will come up with the name of your server and a blinking cursor.
Type the following:
sudo apt update
It will ask you for your password… enter it… it will show up as asterisks. Now you will see how many packages can be updated. Update them all.
We’ll do this by entering the following:
sudo apt upgrade
You will face a screen with a lot of updates, and it you ask you if you want to continue. Type the letter Y for yes
Time for another cup of coffee.
Now you can watch the progress. Once this is complete, restart your computer. You can either do this by selecting the menu icon in the lower left and selecting quit, or typing sudo reboot in the terminal.
This is good practice for you to become accustomed to using the terminal. It’s not difficult, and there are thousands of tutorials online if you ever get lost, or simply want to learn more.
Stay Tuned for PART THREE. If you wish to see the entire article, it is available on our hidden website AT THIS LINK. Note… this link will not work in a normal browser. You will need to use the TOR Browser, or you can open it by using one of the following browsers, copying the link, and opening a New Private Window with TOR by selecting SHIFT+ALT+N: Brave Browser, Chromium, Chrome or the Dissenter Browser, which is supported by Gab.com. If you already currently use one of these browsers, try right-clicking on the link and selecting Open link in a private window with TOR.


I am no expert, but should a tool developed by the government be trusted? Not being argumentative in anyway, my paranoia is really kicking in lately.
@tangle This is a very fair question. The answer is that nothing is foolproof online, and as I indicated in part 1, you should never use your computer without the protection of a VPN (Virtual Private Network) such as NordVPN or ProtonVPN, among others. This goes with hosting a TOR site, or simply accessing the Hidden Web. The VPN doubles your security.
The way TOR works is by encrypting your signal and bouncing your connection through several “nodes” before coming back out into the web. The vulnerability is the “exit node” which may, or may not be a government entity. Also, your connection is encrypted, but not your data. Lastly, never, EVER access the dark web using personally identifiable credentials if you wish to remain anonymous.
Here’s a pretty good article to review regarding the use of TOR with a VPN: https://privacy.net/use-vpn-with-tor/
So, don’t do anything illegal online, even using TOR. Don’t reveal your identity online while using TOR. If it is critical enough that you CANNOT let the information fall into the wrong hands, then meatspace only. The idea of this article is to utilize a very effective tool that facebook, twitter, et al cannot take down, and essentially provide a tool that could provide, at least for awhile, the ability to communicate and share information that big tech, and to some degree, an illegal government, cannot ban and block.
I looked into the Tor Network years ago. Stay away from it! It was developed by our military and is totally unsecure. No matter what they tell you about onions.
I’m pretty computer literate and tried LInux Mint Cinnamon. I found it incredibly frustrating when trying to customize the operation to anything other than the default settings. I also tried TOR and found it incredibly SLOW. I only see TOR being useful in limited situations.
I’ve recently moved to a VPN [Nord] and find it much more useful than the above.
Everyone’s experience is different. We have used Linux Mint for seven years now, and find it to be extremely customizable, fast, and virtually flawless… not sure what you were trying to customize that you were unable to. Granted, it’s not Arch, but Arch is not really a good fit for everyday computer users.
TOR is slow because of its design… it has to makes several hops between nodes to obscure the source. Right now TOR may be difficult, and it’s not intended for everyday use for general surfing (obviously). Every tool has its applications, and TOR and Linux Mint serve very well for the purposes outlined in the article.
NordVPN is an extremely good tool for anyone who wishes to protect their privacy and their data.
Instructions fail for me on the step “tor service restart”. Error is as follows:
James@mintvm:~$ tor service restart
Mar 02 11:11:00.952 [notice] Tor 0.4.2.7 running on Linux with Libevent 2.1.11-stable, OpenSSL 1.1.1f, Zlib 1.2.11, Liblzma 5.2.4, and Libzstd 1.4.4.
Mar 02 11:11:00.952 [notice] Tor can’t help you if you use it wrong! Learn how to be safe at https://www.torproject.org/download/download#warning
Mar 02 11:11:00.952 [notice] Read configuration file “/etc/tor/torrc”.
Mar 02 11:11:00.953 [warn] Failed to parse/validate config: Unknown option ‘service’. Failing.
Mar 02 11:11:00.953 [err] Reading config failed–see warnings above.
Tried googling for solution – no avail, I’m no expert, just dangerous with Linux. Have you missed a step I should have done? Everything was copacetic up to that point.
Hmmm. Thank you for letting me know… just got the same error. Try this: sudo service tor restart
That should do it. I will update the tutorial.